
Video game development with Unity
This tutorial is about game development and is designed so that you can follow along without any previous Unity experience or programming knowledge. You will learn from scratch how to install the development environment and then be guided through the process of creating your first virtual reality application and the process of deploying it to Meta Quest 2 using Unity.
Want to see what the final result will look like? Take a look at the video below:
In order to follow the steps you should have the following things, otherwise you will not be able to create your first Meta Quest 2 application using Unity:
- Meta Quest 2.
- PC with bluetooth.
Windows 10 or 11. - 30GB of free hard disk space.
Installing and configuring the Unity development environment
If you haven’t heard of Unity before, we’ll tell you that it is one of the most popular game creation engines and this is largely due to the great facilities it offers in the development of Meta Quest applications.
And now, let’s get started:
- The first step is to download Unity Hub from this link and install it. Once installed on your computer, log in to your Unity account or create a new one if you don’t have one.
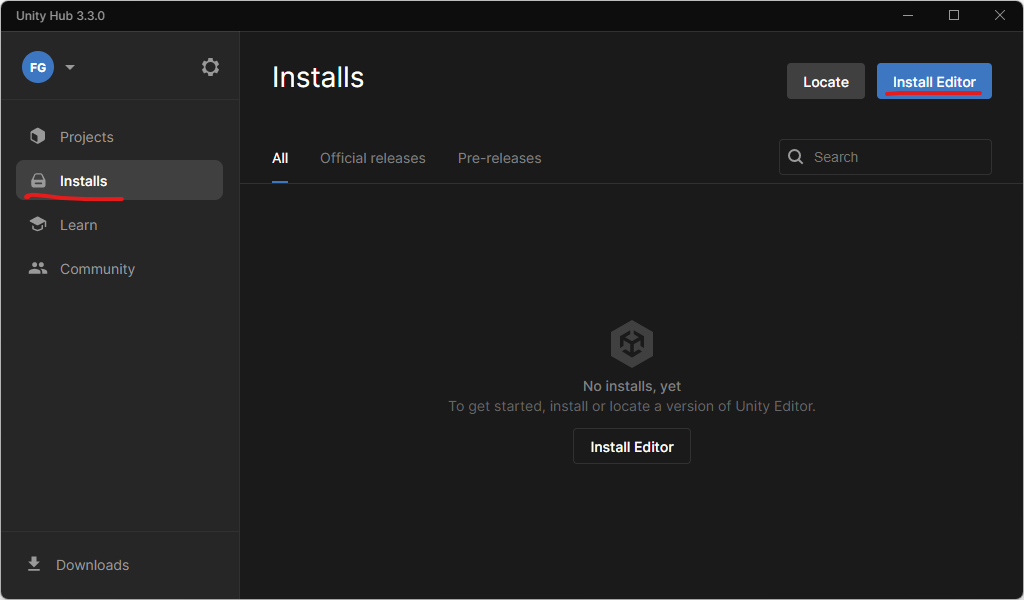
Then, go to the ‘Installs’ section in the left menu of the hub and click on the ‘Install Editor’ button at the top:
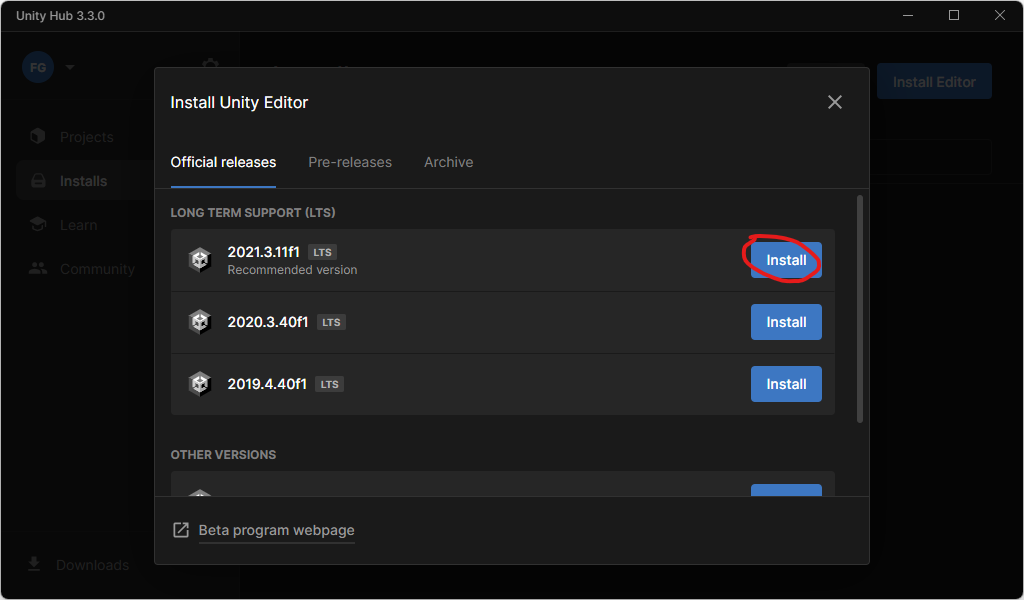
- Select the version you want to install, in my case the latest LTS at the time of writing this article (2021.3.11.f1):
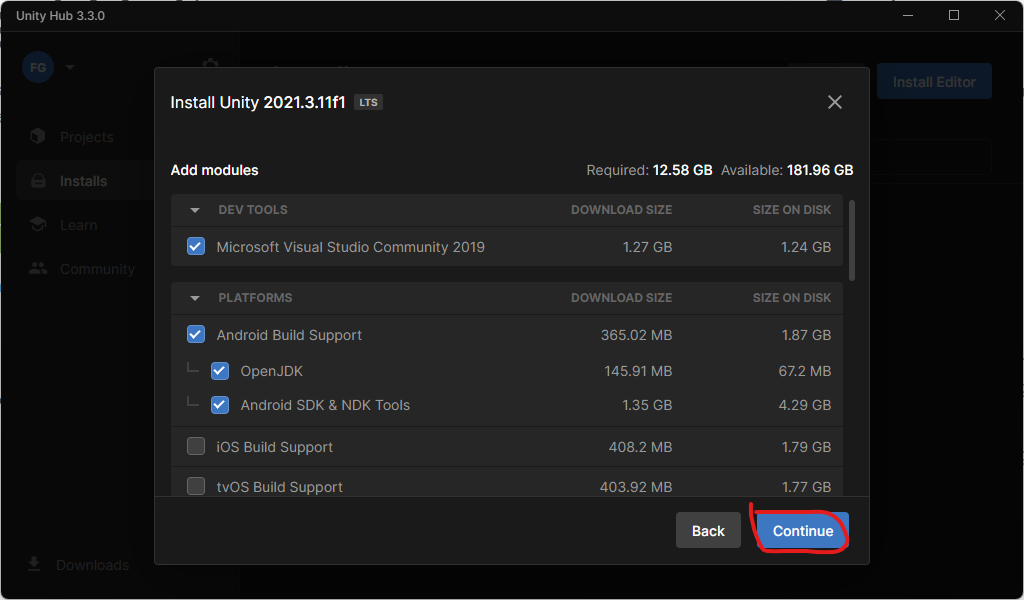
- Make sure to check ‘Android Build Support’, ‘OpenJDK’, ‘Android SDK & NDK Tools’ and ‘Microsoft Visual Studio Community 2019’ (if not already installed). Click the continue button and accept the licence agreements presented to you.
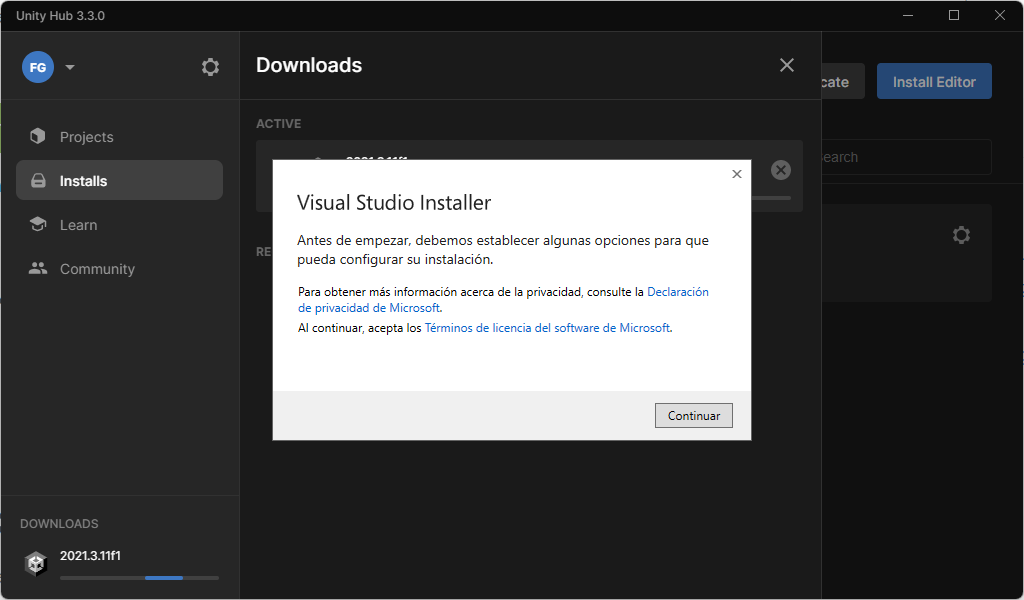
Installation Visual Studio – Unity
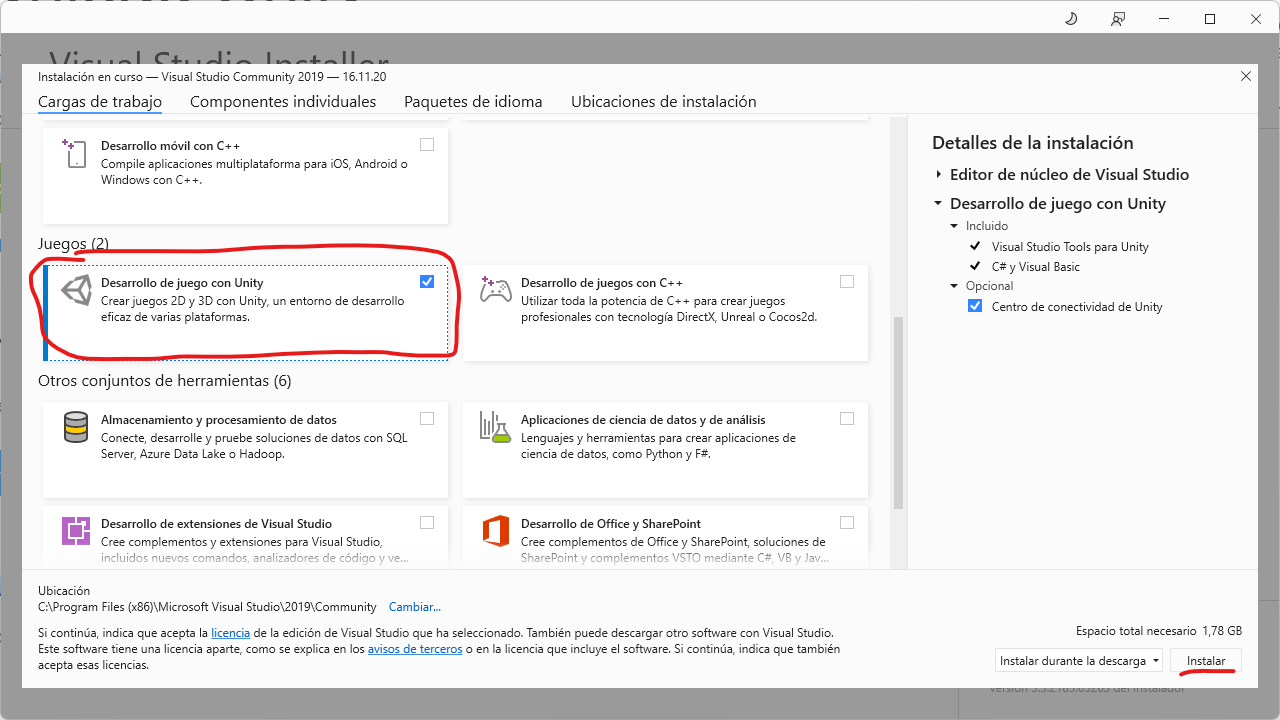
If we chose the Visual Studio installation option in the previous step, we will have to configure some options:
- We will have to check ‘Game development with Unity’ and click on the ‘Install’ button:
- Finally, we will wait until the Unity installation is complete:

How to put Oculus in developer mode?
Now we need to convert our Oculus account to a developer account. Why is this step important?
The reason for activating developer mode is twofold:
- You’ll be able to install apps you’ve made yourself (otherwise you can only download apps from the app shop).
- It allows Unity to detect the glasses and so you can install the game directly by clicking a button in Unity.
Without developer mode you can make the game, but you won’t be able to use it.
Let’s get started:
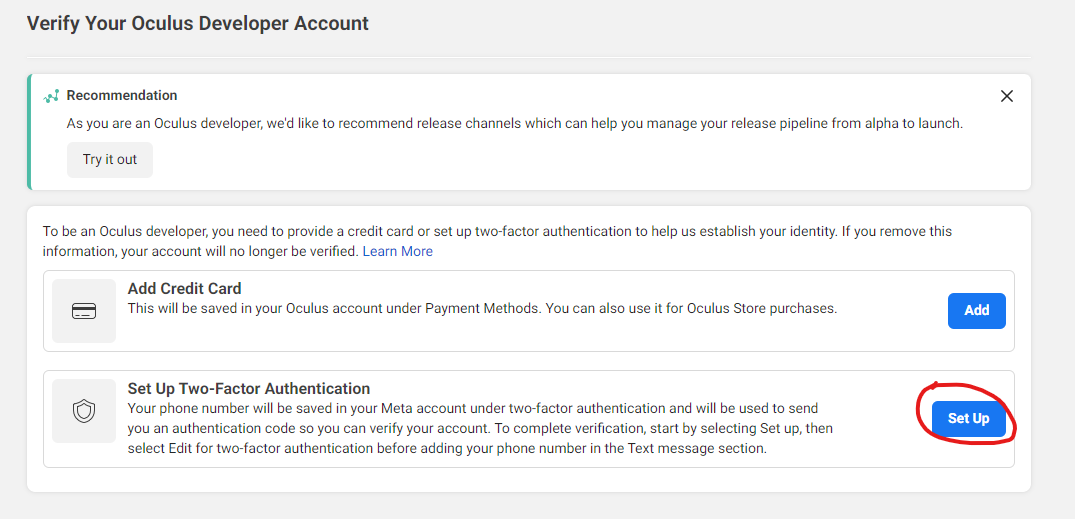
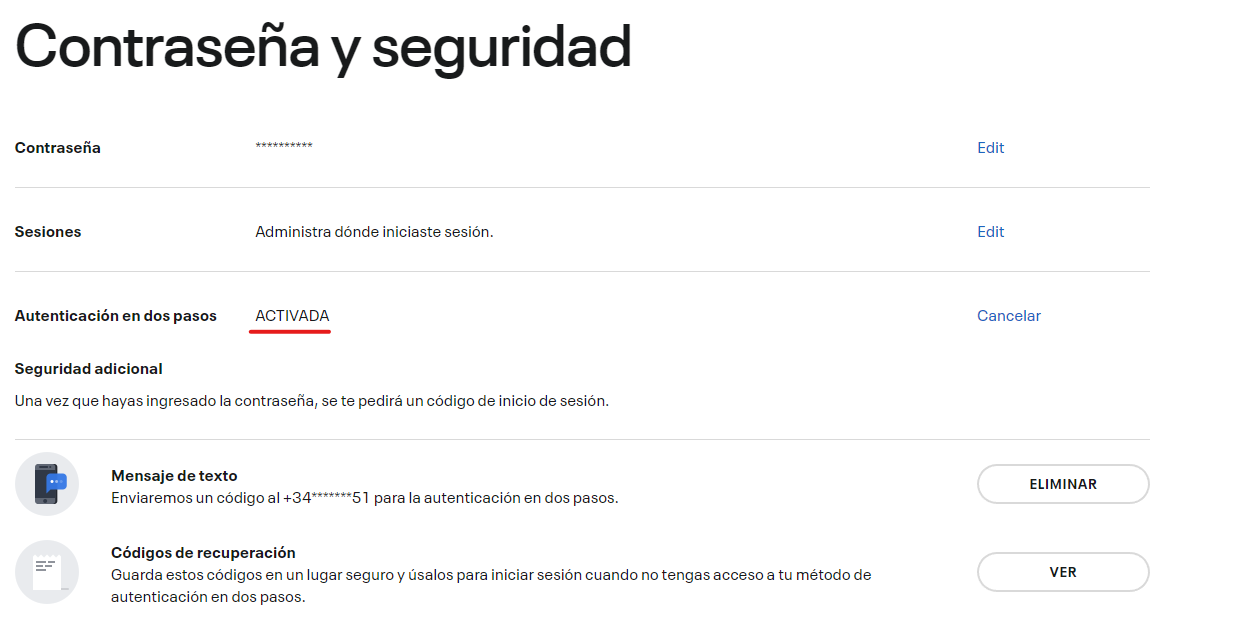
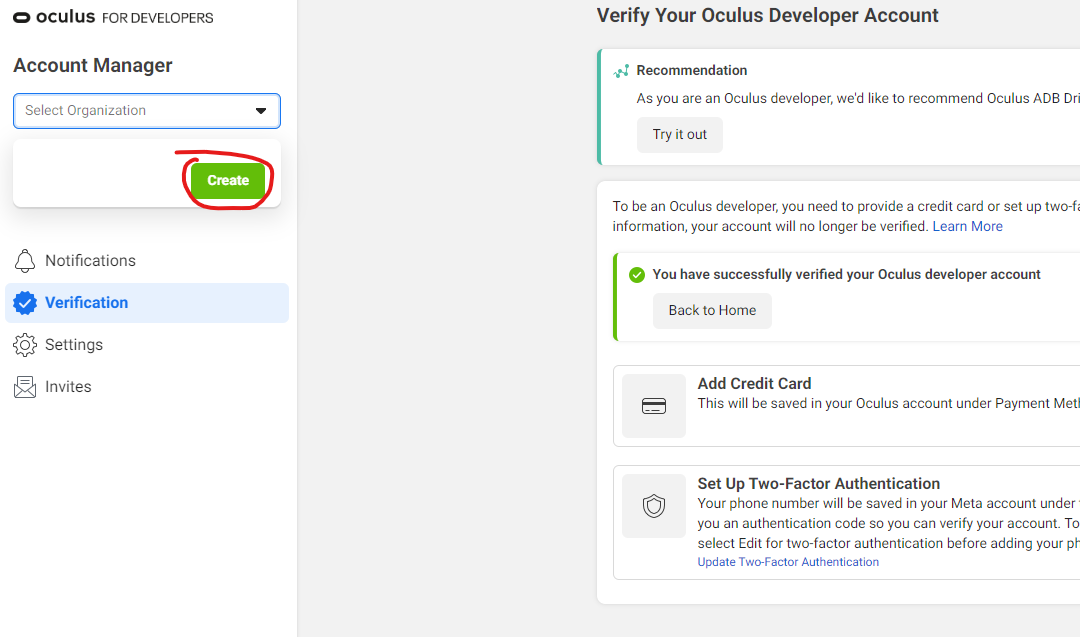
- The first step is to go to this link https://developer.oculus.com/manage/verify/ and verify your account. In this case I will verify it by activating two-factor authentication:
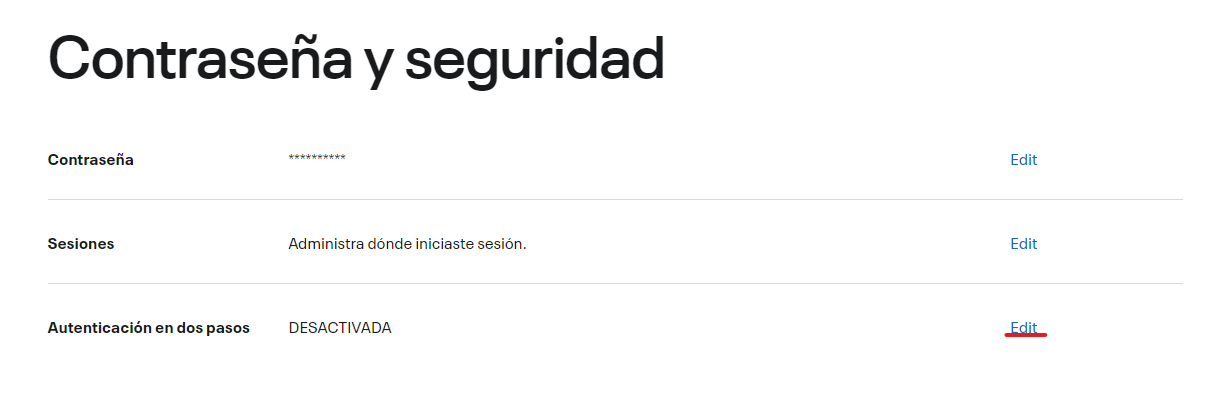
- Click ‘Edit’:
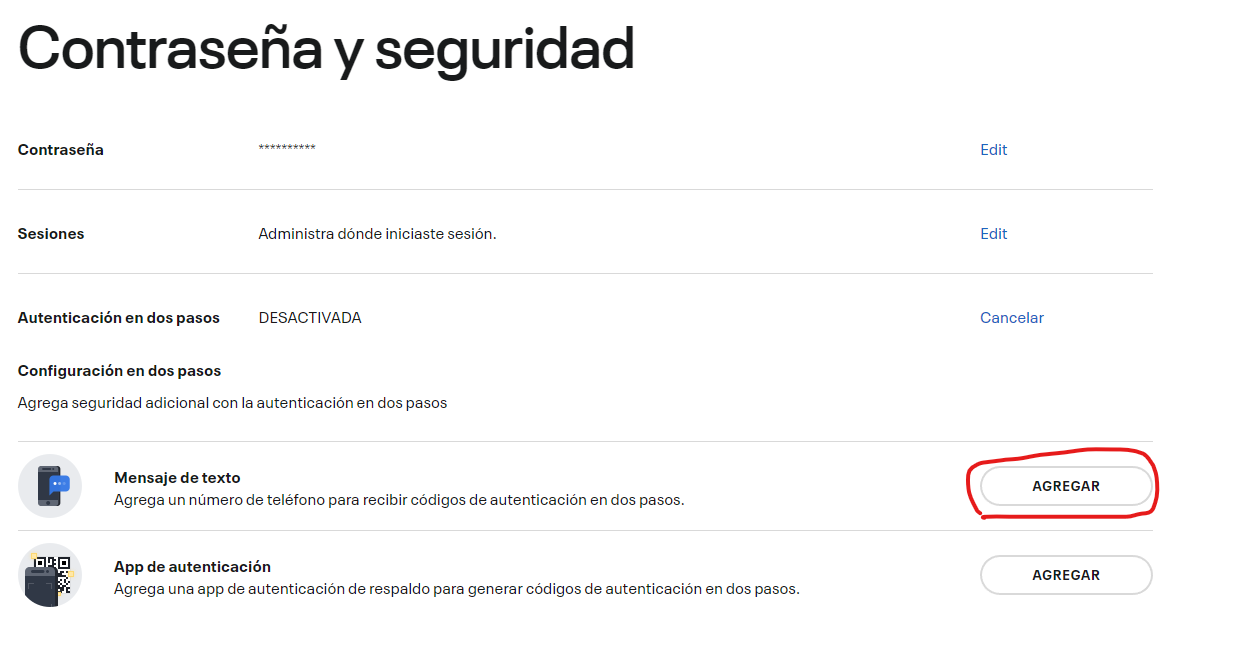
- Click ‘Add’ and enter your country and phone number:
- After a few minutes an SMS will be sent to your phone with a code that you will have to enter on the same page. Once this has been done, it will be confirmed that the two-factor authentication has been activated:
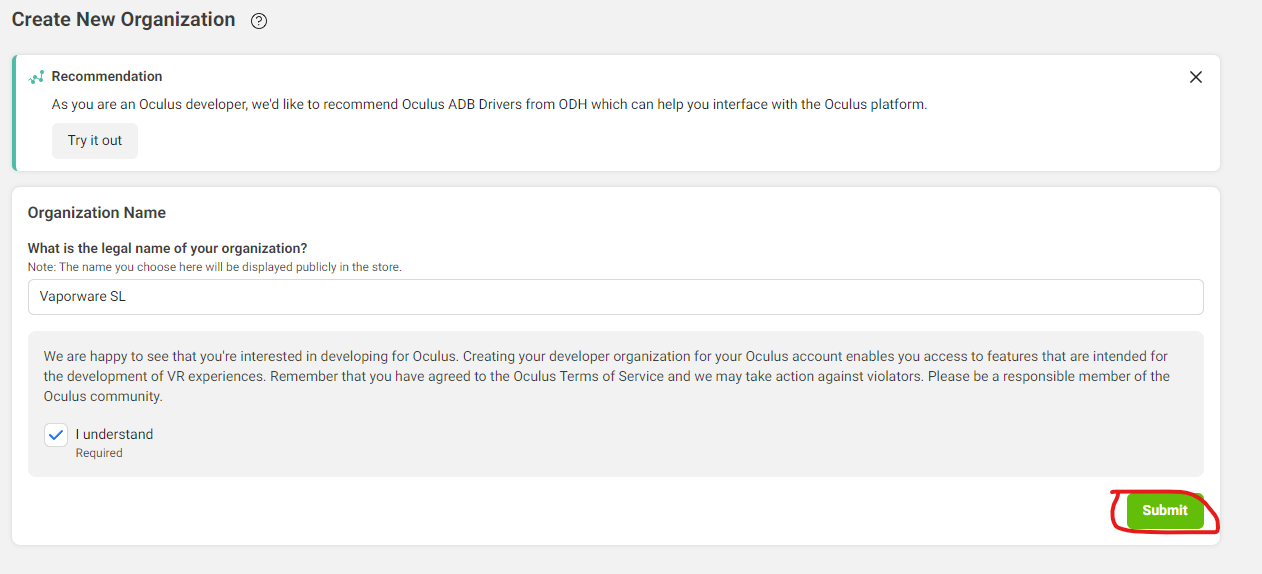
- Once verified, the next task is to create an organisation:
- We will choose a name for our organisation and click the ‘Submit’ button:
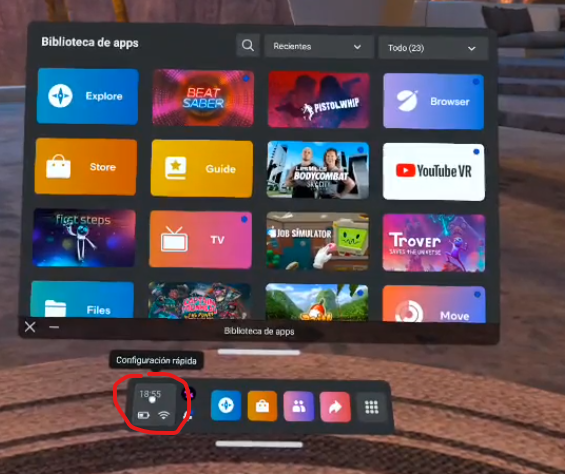
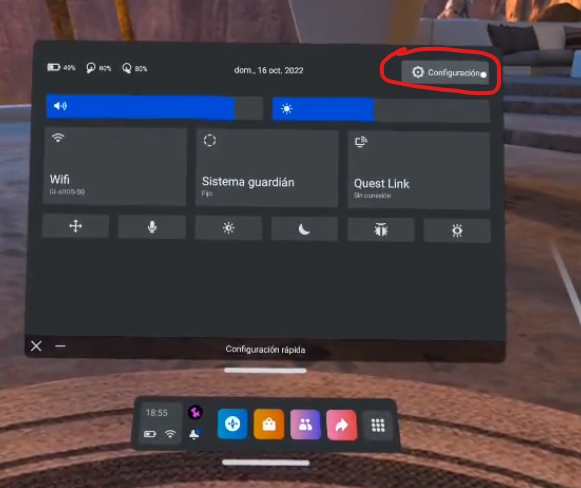
- With the headset turned on, the next step is to put it in development mode. To do this we will first go to the quick settings:
- Then go to ‘Settings’ by clicking on the button in the top right corner:
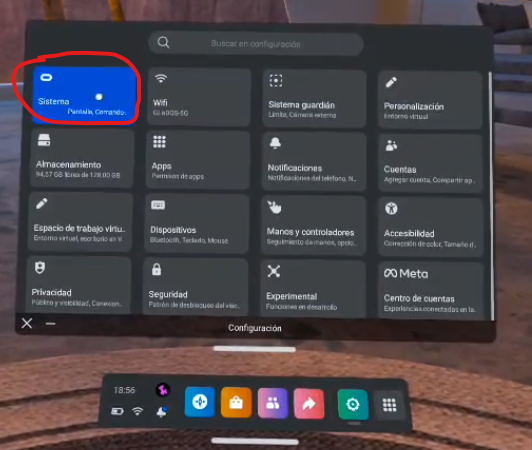
- Now to the ‘System’ section:
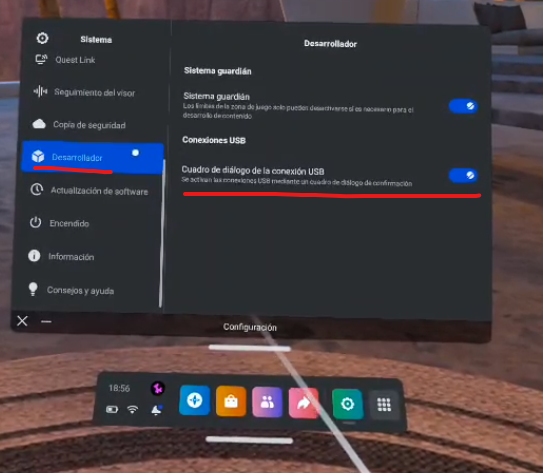
- And under the ‘Developer’ category, make sure that the ‘USB connection dialog box’ option is activated:
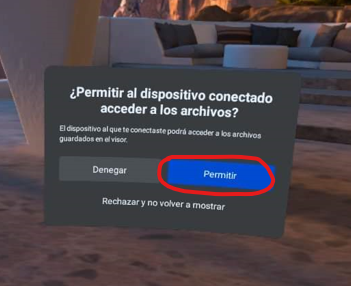
- If everything is OK when you connect the Quest 2 to the PC, you should get a dialogue box similar to the one below, in which you click ‘Allow’:
- Back on the computer, download the ADB drivers from the link https://developer.oculus.com/downloads/package/oculus-adb-drivers/ and extract the zip file anywhere.
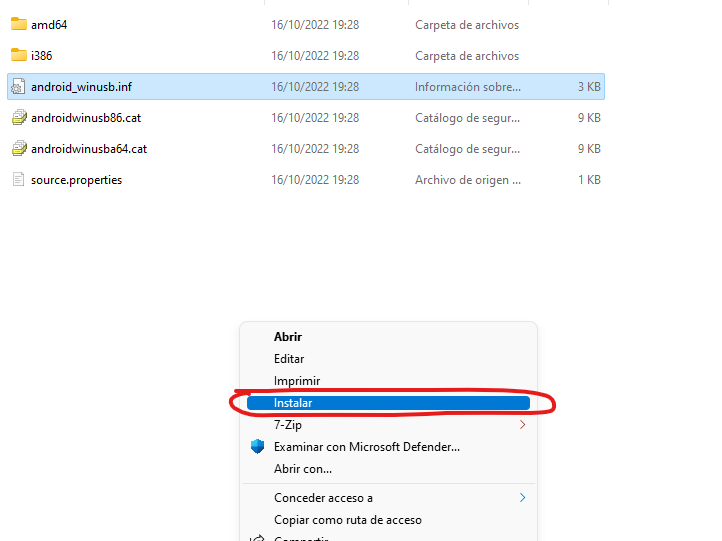
- Then right click on the ‘android_winusb.inf’ file and select the ‘Install’ option. Accept any warnings from Windows:
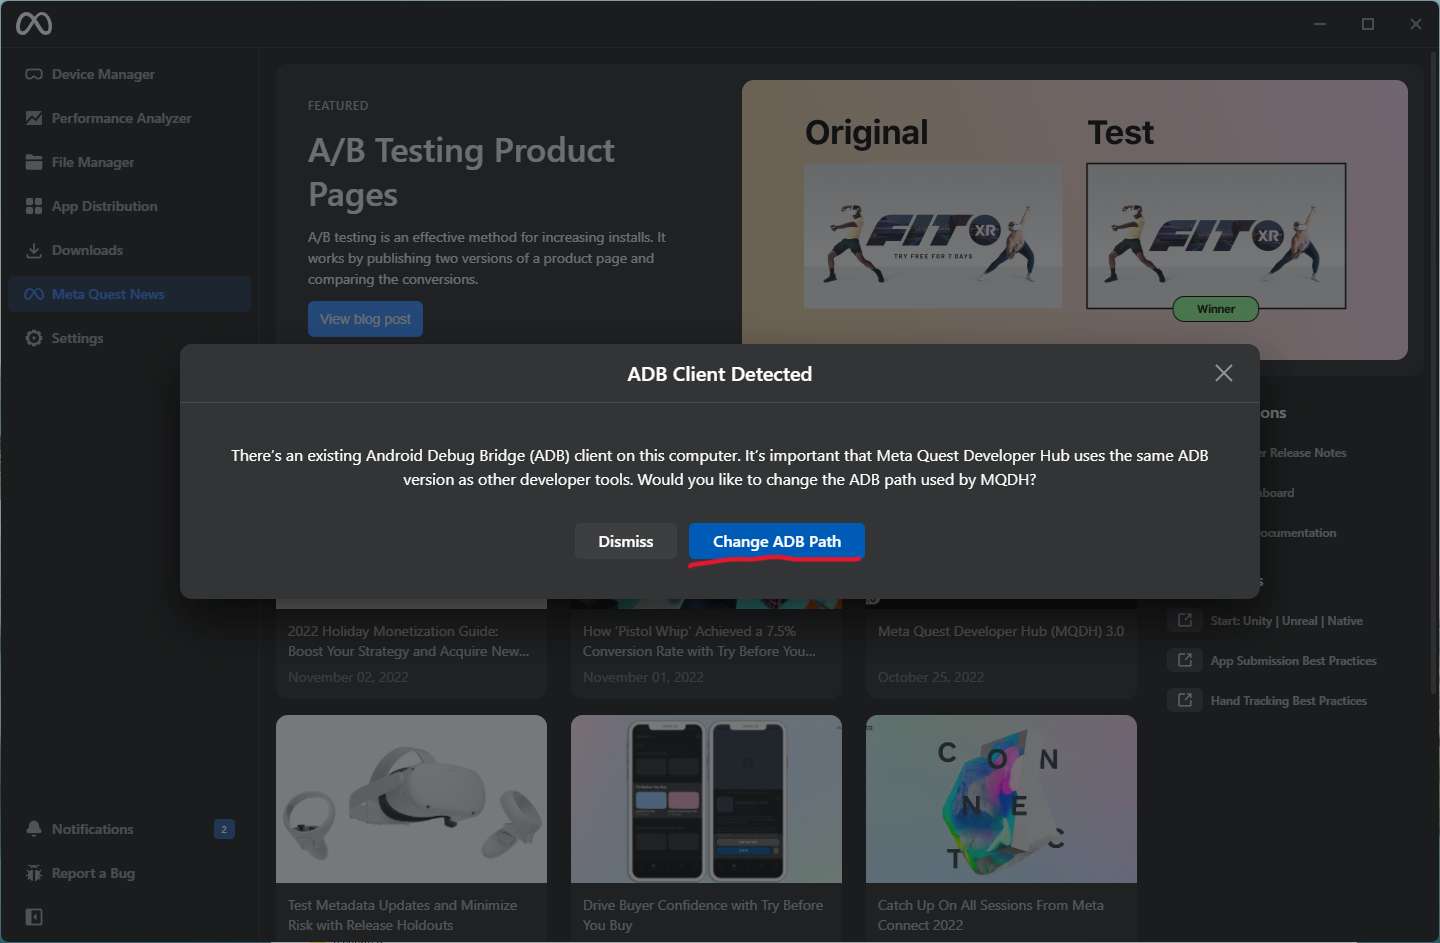
- Now we disconnect the Quest 2 from the PC, download the ‘Meta Quest Developer Hub’ program from the following page https://developer.oculus.com/documentation/unity/ts-odh/, install it and open it.
- Once it is open we will have to log in with our Meta account and accept the license agreements presented to us. If the following dialog box appears, click on ‘Change ADB Path’:
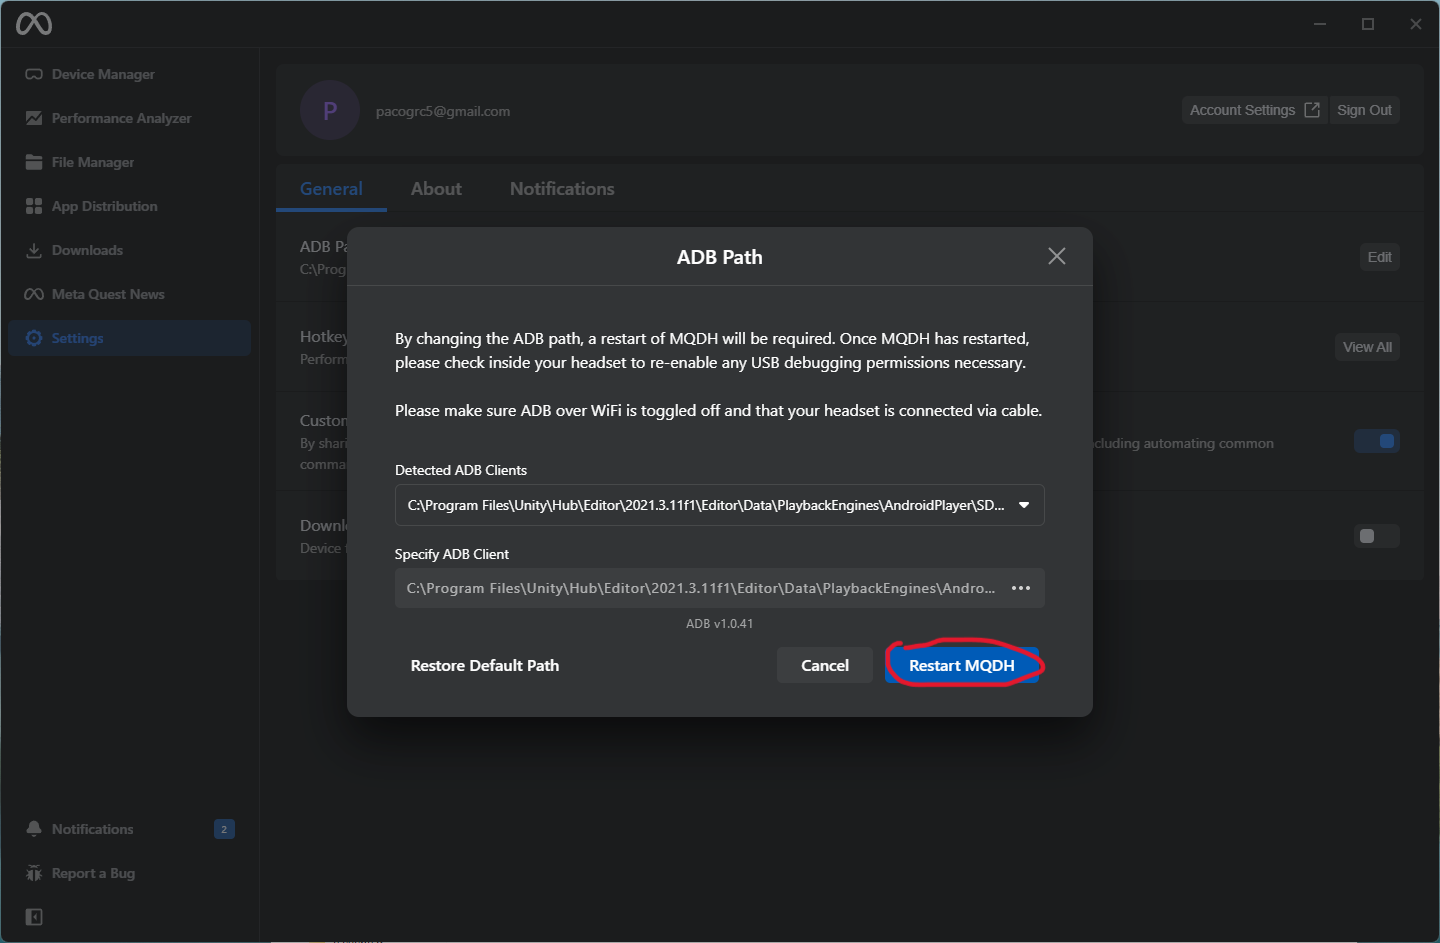
- Select the ADB corresponding to your Unity installation and wait for the application to restart.
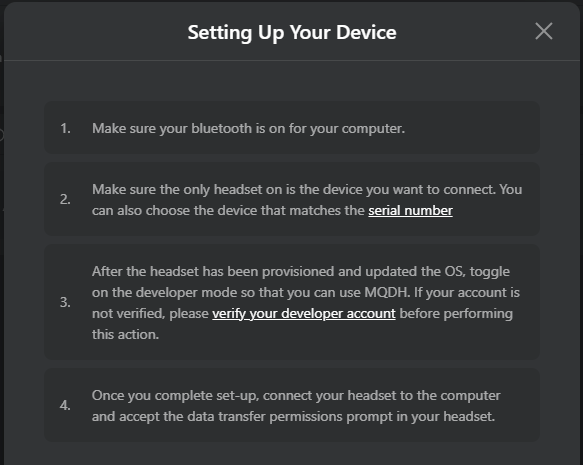
- In the ‘Device Manager’ section, click on the ‘Set Up New Device’ button and follow the steps that appear on the screen:
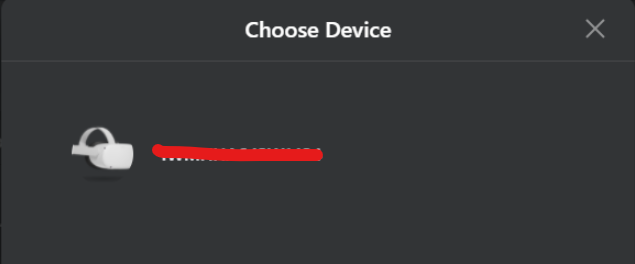
- We make sure we have the computer’s bluetooth turned on, click on ‘Next’, choose the model of our virtual reality headset (in my case Quest 2) and finally our specific device from the list presented to us:
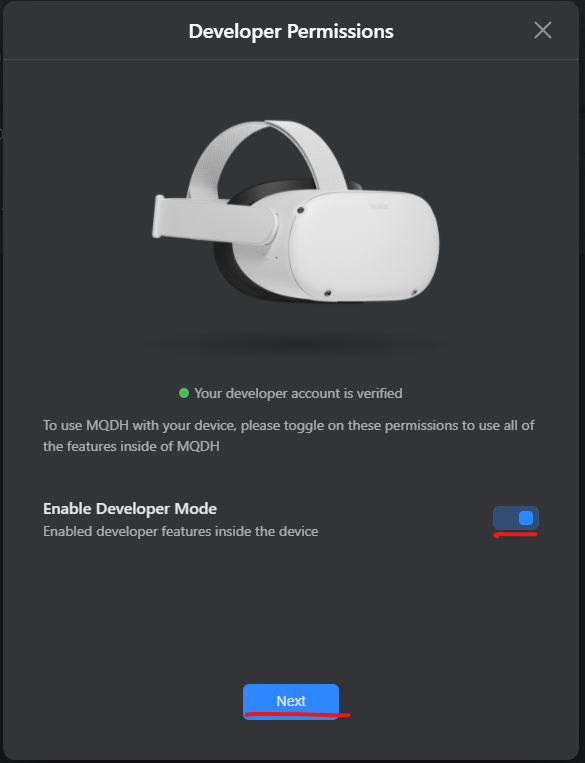
- Click ‘Next’ again and wait until you are asked to log in with your account. Once logged in we will have to select and configure the WiFi network we want the glasses to connect to. Finally, we will activate the developer mode when asked:
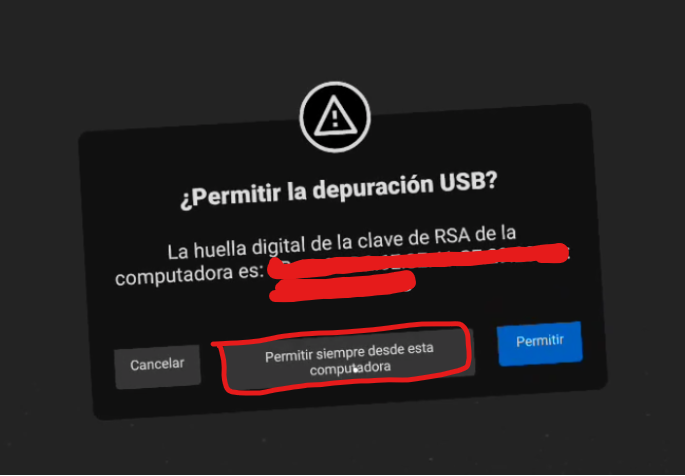
- Now simply connect the Quest 2 to the computer and click ‘Always allow from this computer’ when presented with the appropriate dialogue box:
- If everything went well, we are now ready to create our first Unity project.
Creating an application for Quest 2
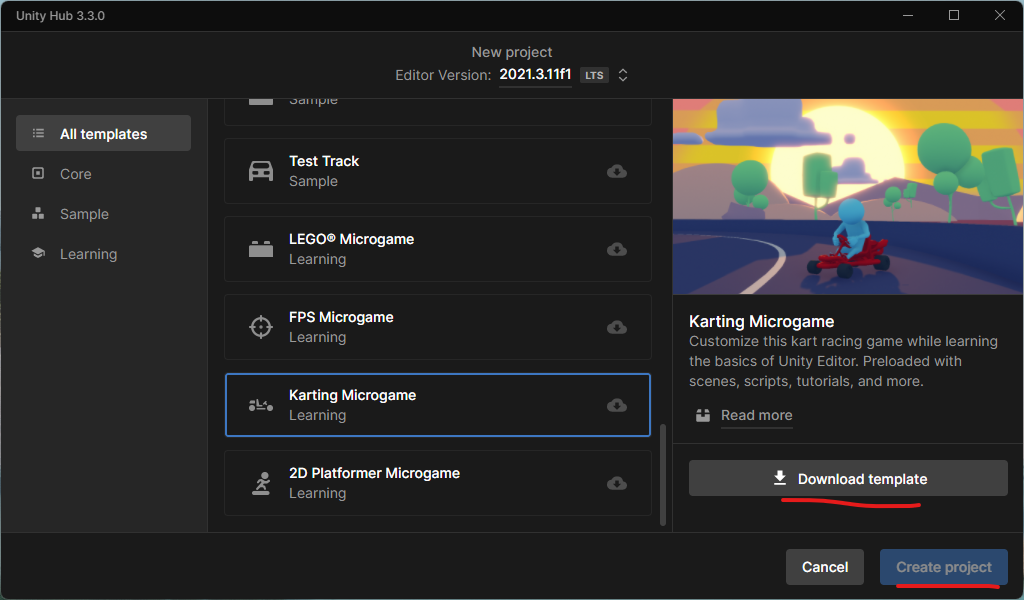
- In order to speed up the development we are going to reuse the ‘Karting Microgame’ template available within Unity Hub.
- Open Unity Hub, select ‘New Project’ in the top right corner of the window and choose the ‘Karting Microgame’ template:
- Finally we will give the project a name and we can create it, in my case I have used the name ‘KartingAR’. The project will open in the Unity editor and click ‘Load Scene’ when asked.
- From the scene that will open we will delete all the components except the ones shown in the following image:

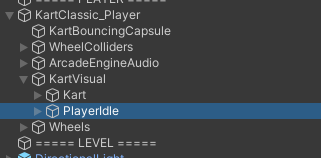
- Right click on the object ‘artClassic_Player’ and click ‘Prefab’-> ‘Unpack completely’ and delete the script ‘KartPlayerAnimator’. Once this is done we delete the object ‘PlayerIdle’ which is a child of ‘KartVisual’. In the picture you can see where it is located:
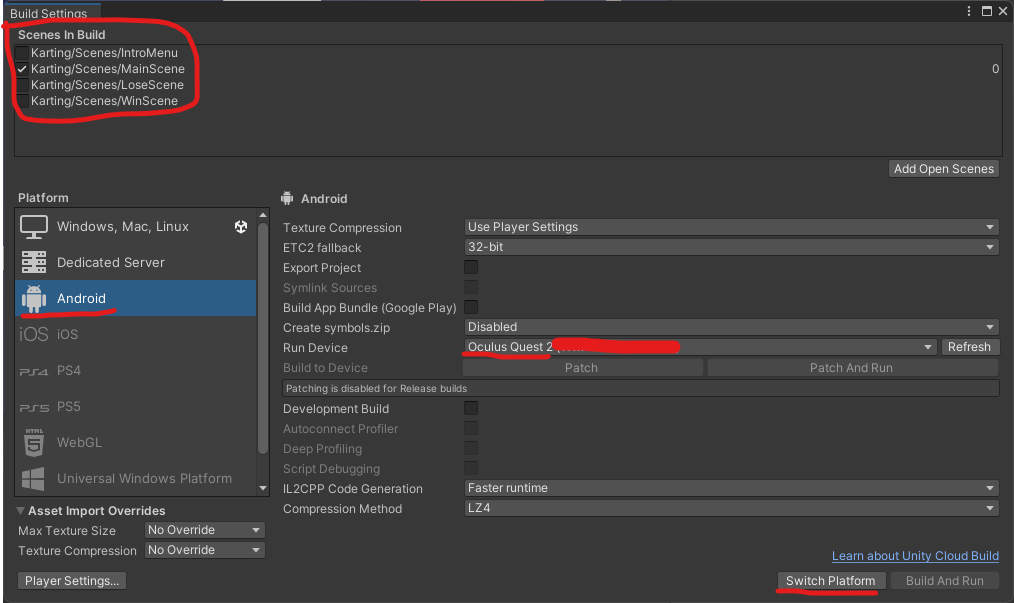
- Go to ‘File’ -> ‘Build Settings’, make the following settings and click the ‘Switch Platform’ button:
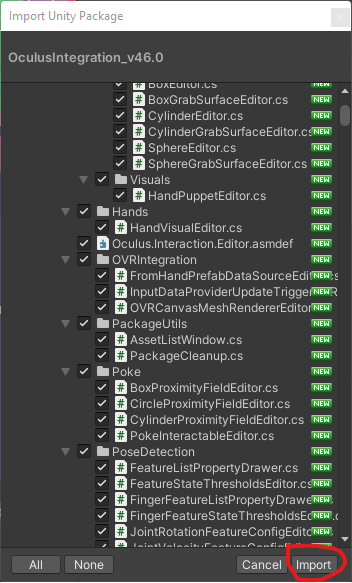
- Download the oculus integration SDK from the following website https://developer.oculus.com/downloads/package/unity-integration and once downloaded click on ‘Assets’ (in the top bar of Unity) -> ‘Import Package’ -> ‘Custom Package’, select the downloaded file and import it:
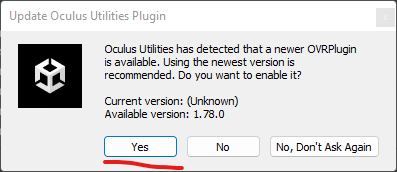
- Wait for the following dialogue box to appear and click ‘Yes’:
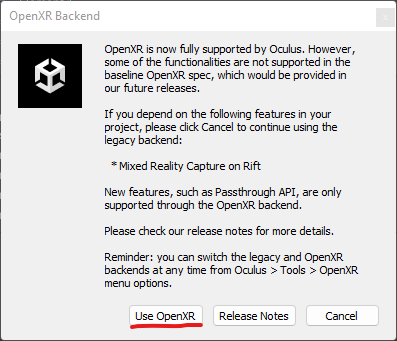
- Then ‘Use OpenXR’ and ‘Ok’:
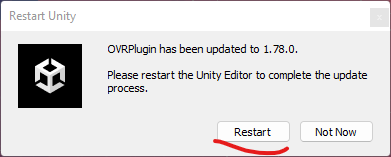
- Click the button to restart the editor when asked:
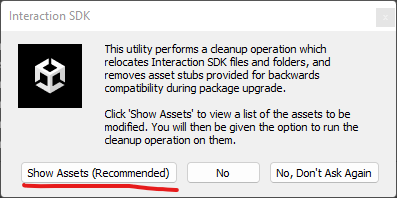
- If the installer asks you to perform a cleaning operation, click on ‘Show Assets (Recommended)’:
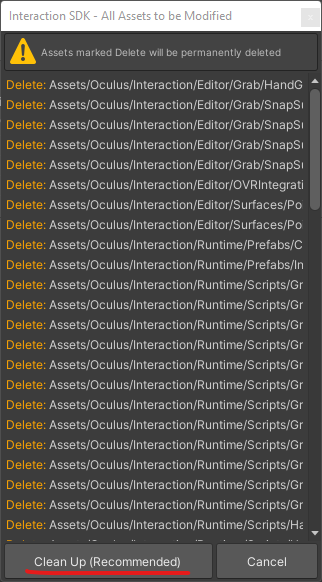
- And ‘Clean Up (Recommended):
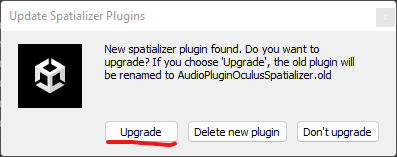
- If a box with the title ‘Update Spatializer Plugins’ appears, click ‘Upgrade’:
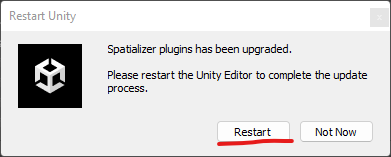
- And finally we will restart the editor when it asks us to do so:
- Once the editor is open again we must configure a series of parameters to be able to run the application (which can be seen in more detail in the following link https://developer.oculus.com/documentation/unity/unity-conf-settings/).
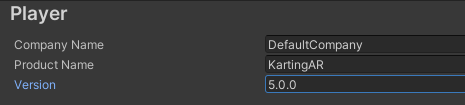
- First we will go to ‘Edit’ in the top bar of Unity, ‘Project Settings’->‘Player’ and we will define the company and product name and the product version:
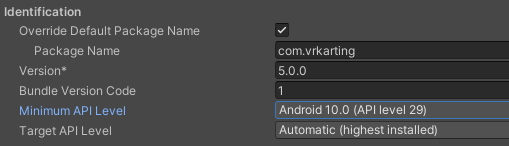
Further down, in the tab with the Android logo and in the ‘Other Settings’ section, we will have to configure the following properties:
- Subsection ‘Identification’:
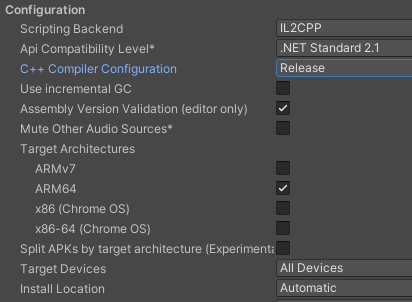
 Subsection ‘Configuration’:
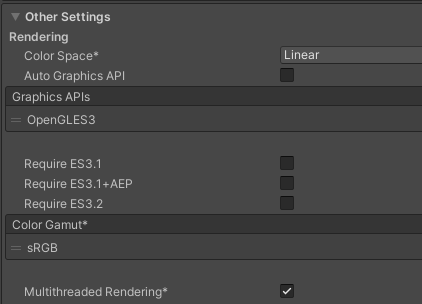
- Subsection ‘Rendering’:
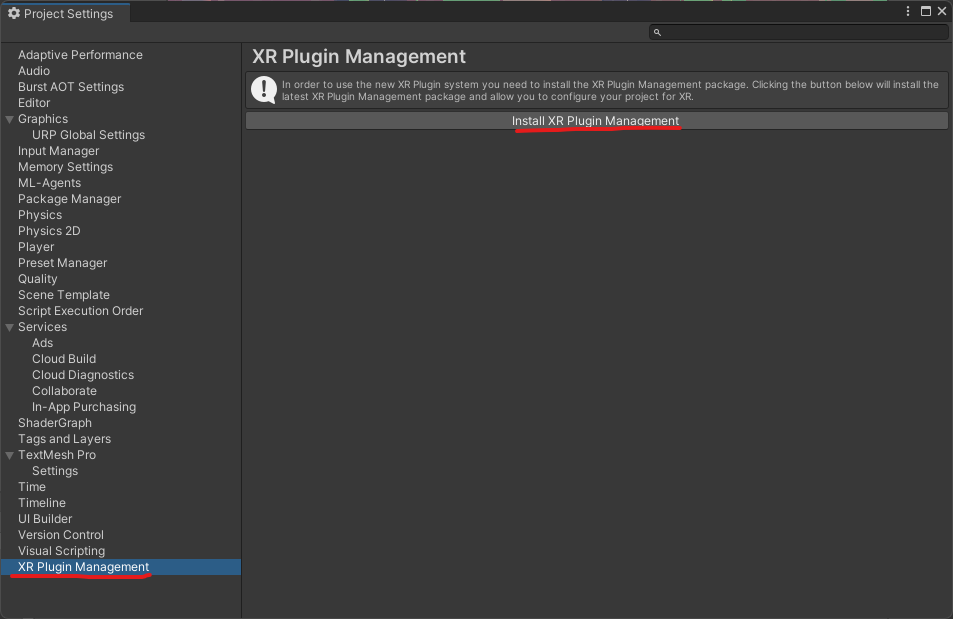
- Then go to the ‘XR Plugin Management’ section and install the plugin by clicking on the corresponding button:
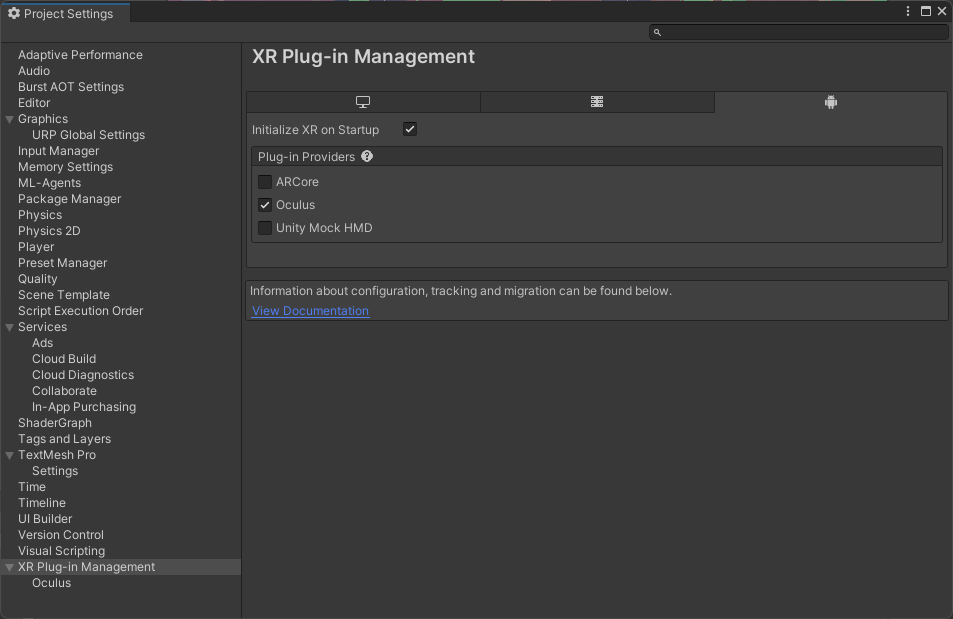
- And we will configure it as follows:
- In the ‘Quality’ section, check the options shown in the image:
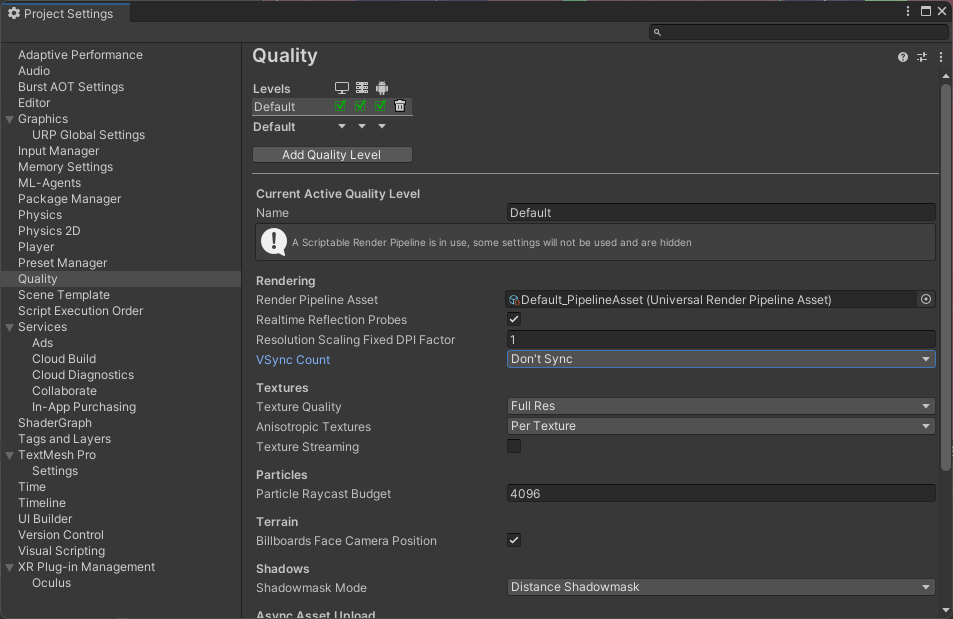
- In the folder ‘Assets’ -> ‘Rendering’ select the file ‘Default_PipelineAsset.asset’ and configure the ‘Quality’ section as shown in the image:

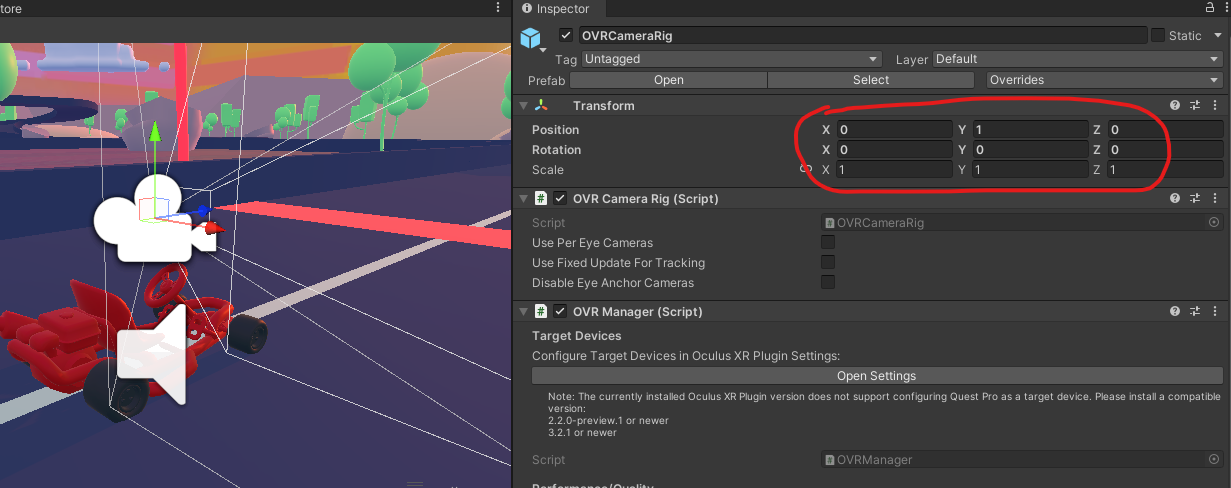
- We will add an ‘OVRCameraRig’ to our scene. For this we will go to the path ‘Assets’ -> ‘Oculus’ -> ‘VR’ -> ‘Prefabs’ and add it inside the kart as follows:
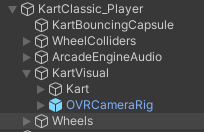
- This object is the virtual camera and represents the player’s head, so it has to be placed in the position it would occupy inside the car, more or less like this:
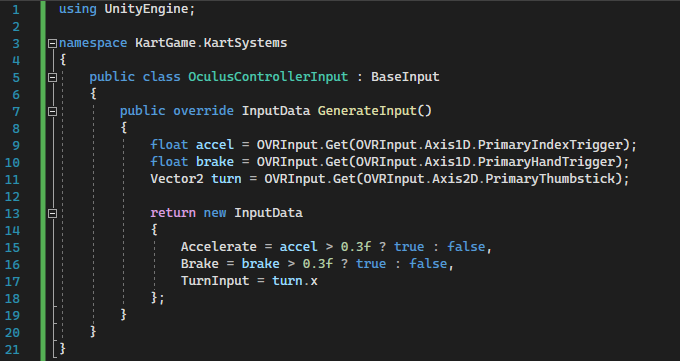
- Now we only need to be able to control the kart with the Quest 2 controllers. For this we will create a folder called ‘Scripts’ inside ‘Assets’ and we will add a C# script called ‘OculusControllerInput.cs’ and copy the code from the following image. This script will allow us to accelerate the car with the trigger, brake with the grip and turn with the joystick.
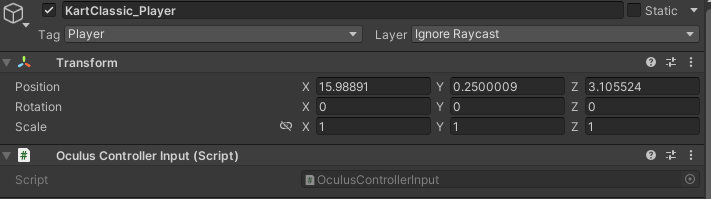
- We remove the ‘KeyboardInput’ script from the ‘KartClassic_Player’ object and replace it with the ‘OculusControllerInput’ we just created:
- If everything has gone well, we will be able to use our application on the real hardware. To do this, just click on the ‘Build And Run’ button in the ‘File’ section of the top bar of Unity. We will name the .apk file with any name and once compiled, it will run automatically on the headset. And just like that, you will have your first application in Meta Quest 2 using Unity.
If you liked this article and would like to receive valuable information like this, don’t forget to subscribe to our newsletter.